So the last few posts have been more “tutorial-ey” than I intended - I think its how I tend to write honestly. Not sure if it's a bad thing or not, but at least every so often I'll try to shift to more of a straightforward update on the game, what I'm working on etc.
As I posted previously, I’ve been working on a reset of a game that I’ve been poking at for ‘far’ too long (sigh), and have been slowly building things up.
I’m not worrying about the visuals for the UI or the environment at this point, just purely focusing on functionality. Unlike…some opinions…the “graphics” are ‘far’ from the first thing that is finished in a game, and for a multiplayer game like this, there’s an awful lot of staring at console logs and event messages trying to figure out why something happened in one version of your game and not the other.
What does a typical gamedev session look like?
The 2 main programs that I have open at any point are:
the Unity Editor - duh
Rider - what I use to write code
In fact here’s a screenshot of what I’m working on right now across both screens:
Basically I have the unity editor open on one screen and Rider on the other. The floating window over Rider is an instance of the game that I’ve built and am running locally. Depending on whether I’m testing the master client or a ‘joining’ client (or clients), I’ll start a game session in the editor from a built version of the game.
Build → Run → Repeat
As you might guess, this means that I’m making a LOT of game builds, which is absolutely correct. Most of the time, testing the game means making a build and launching multiple versions of it at a time - either through the Unity editor or just as a local version.
Note: while I DO have playfab and steam integrated into the game right now, one big challenge that presents is that you can only be logged into ONE steam account on a computer at a time - so if I run 2 copies of the game, both basically are logged into the same Steam account, which…causes issues logged into Playfab (the account / backend that I’m using) and so on.
So what I’ve done is once I validated the Steam auth worked, I’ve basically wrapped all of the Steam code in the AuthService with a define, like so:
#if USING_STEAM
// do steam stuff
#endif
and then basically commented out the define that enables all of the steam functionality.
//#define USING_STEAMPlayfab provides a number of different ways to log into it, so when the Steam auth is disabled, I’ve basically created an alternate authentication method that just logs in with a custom user ID, randomly generated when I run the game.
This lets me run through the full login, access the Playfab back-end (and custom Photon authentication) without requiring the Steam wrapper to be enabled.
This has streamlined SO MUCH of the general day-to-day coding that I need to do for the time being at least. Once I get to the point where Steam ‘must’ be enabled, in order to do a simple build & run of the game, I’ll need to not only make the build, but copy it to another PC to actually test it.
That’s not the end of the world, but it’s a pain in the ass, so I’m avoiding it for the time being ;P
So what are you ACTUALLY working on?
For the past few days I’ve been working on the gameplay lobby for the game, adding more functionality to it, and basically making sure that everything is solid.
Before I go into more detail, first a quick summary of the game flow currently.
Currently there are 3 primary scenes in the game:
MainMenu
Gameplay-Lobby
Gameplay-Mission
The Main Menu scene is the ‘bootstrap’ scene that I discussed previously. It starts the engine and gets things going. It also has the main UI for the game so far.
Normally I do have a ‘bootstrap’ scene separate from the ‘main menu’ scene - and likely will separate the bootstrap eventually, but for now the main menu is very temp and loads fast enough so I’m not concerned about the scene being too heavy.
To explain the difference between the Gameplay LOBBY scene and the Gameplay MISSION scene, I probably need to explain some of the networking level setup.
Photon (the networking library that I’m using) has the high-level concept of a Lobby and Rooms. Rooms are similar to a game server, whereas the Lobby is a higher-level construct where you can get a list of rooms and other info. The Master Client in photon terms is the ‘owner’ of the Room, and is responsible for the room.
I don’t intend to have a server list ala Counter-strike, but the basic concept will apply - the player starts the game, gets a list of rooms (active game sessions) and then chooses to join a room.
Alternately the users can ‘create’ a room, which in turn is visible to other players and they can join, until the game is full, at which point the game starts. Once the game is started, it is set to not visible, which hides it from the list of rooms in the lobby (so other players can’t join mid-session).
Fairly standard network-game stuff, right?
So in my case, in the main menu there is a screen that displays all of the open rooms, clients can join the room.
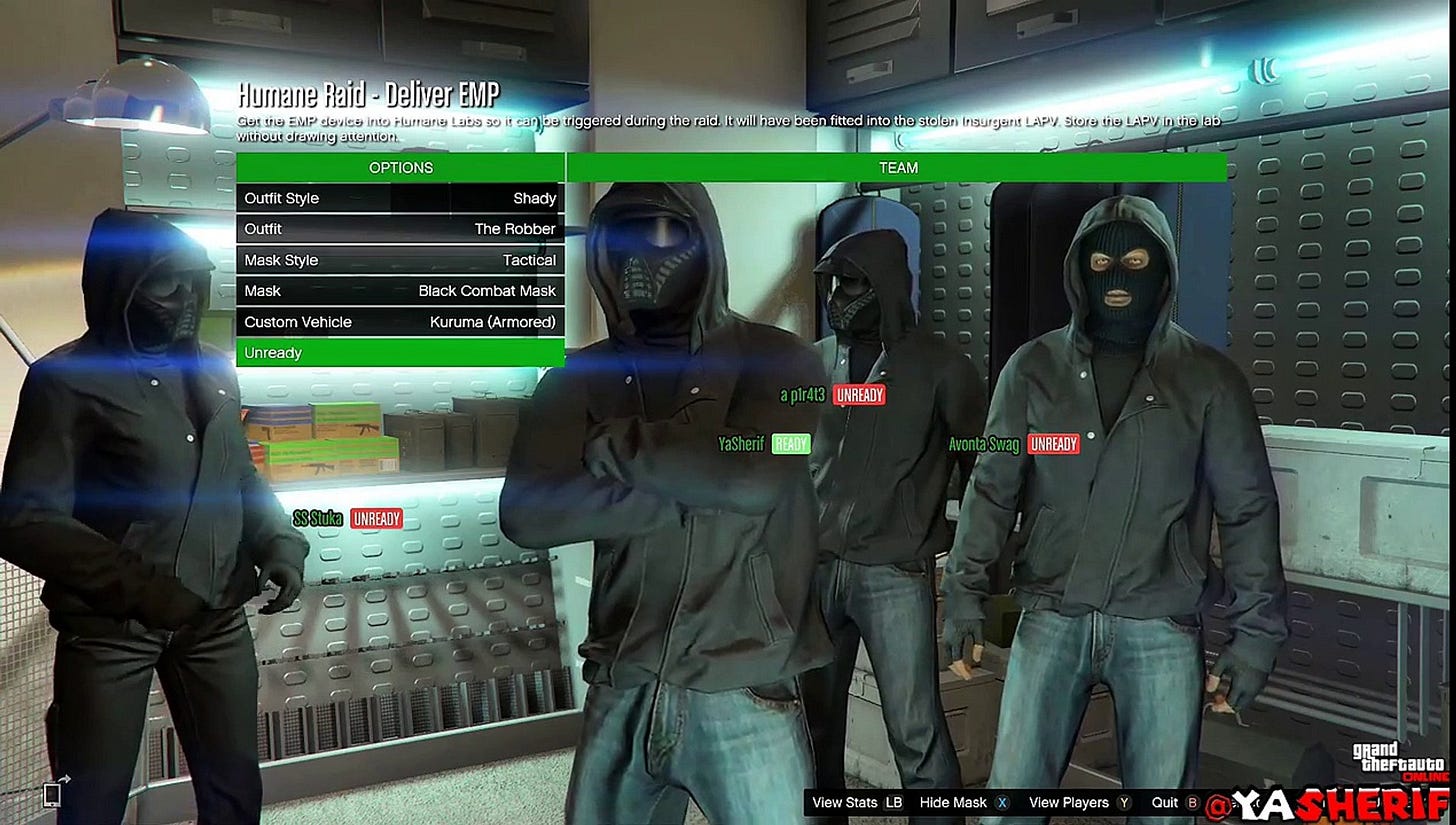
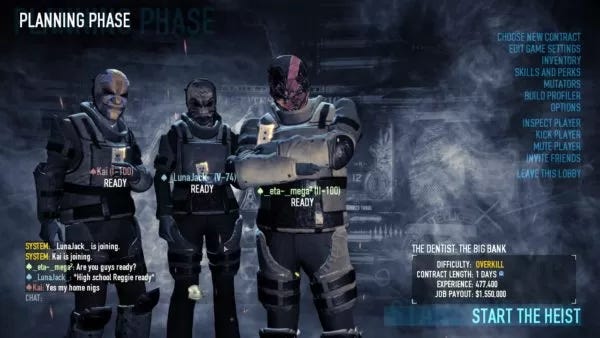
Once the client joins the room, the game loads the Mission-Lobby scene, which is sort of a 'holding area’ that is used to allow the players to ready-up, prepare for the mission.
This is similar to how GTA Online and Payday handle their pre-mission setups, shown below:
Ok so you get the basic idea. This screen will eventually let the players customize … stuff (weapons, appearance, etc) prior to starting the mission and otherwise serves as a holding area before the game actually starts.
So the basic scene flow is:
Main Menu → Gameplay-Lobby → Gameplay-Mission
Note: the ‘Gameplay Lobby’ is different than the Photon Lobby that I discussed above - once the players have joined the gameplay lobby, they have joined the photon room and have loaded into the networked game.
Each player in the Photon room has a set of ‘custom properties’ that can be set and automatically synced to the other players - this is how the ‘ready’ status is shared in the lobby screen. We’ll also use these for respawn count / player lives, that type of thing as well.
The master client waits for everyone to have their custom property ‘PlayerReady’ to be set, and then they can start the heist!
One last thing!
So all of the above is what I’ve been building towards, it’s getting close, but of course there is one other detail that is missing: the player character themselves!
The actual gameplay character prefab has a ton of components on it and basically is pretty complicated (it’s the full Opsive Character controller, which has a TON of stuff on it).
So in order to spawn a simple Lobby Version of the player character, I’ve added a call to listen for the character spawn event and instead of spawning the gameplay character, I’m just spawning a separate Lobby Character prefab instead, which can have it’s own animator controller (to play various random animations) and basically be separate from the main gameplay character
This does mean that I have 2 character prefabs for each ‘actual’ character, but will keep things simpler - basically it’s just the default prefab (before I turn it into the ‘gameplay’ prefab) with a custom ‘lobbycharacter’ script on it, which currently just plays a random animation every so often.
For the lobby characters, there are separate spawn points for each character, so as the players join the game, I keep track of which ‘slot’ it taken and spawn the next player in the next open slot. This lets me create a similar character line up that populates as the players join the game, similar to Payday / GTA Online.
It’s not perfect, there’s a bunch of edge cases that I need to work through still, but it’s slowly getting there.
Here’s a quick video showing the new gameplay lobby and the characters (currently just hardcoded to one of the actual game character prefabs) spawning in as the other players join in!
Anyways, that’s where things are at currently.
Some stuff that I’ll be working on next:
Loading the actual player data from Playfab, which will remember which character skins the player has selected, other customization details etc, so the character skins aren’t all just hardcoded like they are currently.
Updating the Game Lobby UI so that the player info aligns with the players as they join. Still need to do some proper UX work, so I’m not going to spend too long on it yet, but want to get it close-ish to what I think it will eventually be.
If you want to check out the rest of the todo list so far, feel free to check out the public roadmap that I have over on Codecks! It’s a great to-do list that I’m using to track things that I’m working on. It’s far from complete, but I’m trying to use it to stay organized.
https://open.codecks.io/dystopiapunk
That’s it for this time, as always, feel free to ping me on Mastodon if you want to chat about the project, Unity #gamedev or otherwise!
Thanks for reading, until next time!


